Trout farming at home can be a rewarding and sustainable way to enjoy fresh, high-quality fish right from your backyard. I remember when I first started exploring the idea, I was overwhelmed by the sheer amount of information and the variety of setups available. But with some research and careful planning, I found that raising trout at home is not only doable but also a fantastic way to connect with nature and produce your own food. Here’s a detailed guide, based on my personal experience, to help you get started with trout farming at home.
Step 1: Understand the Basics of Trout Farming
Before diving in, it’s important to understand what trout farming involves. Raising trout requires knowledge of their habitat needs, diet, and growth patterns. Trout are freshwater fish that thrive in cool, clean water with high oxygen levels. They are relatively fast-growing and can be raised for food or simply as a hobby. Understanding these basics will help you make informed decisions as you set up your home farm.
1.1 Why Choose Trout?
Trout, particularly rainbow trout, are popular for home farming because they are hardy, grow quickly, and are relatively easy to care for compared to other fish species. They are also a great source of protein and omega-3 fatty acids, making them a healthy addition to your diet.
Step 2: Select the Right Location
Choosing the right location for your trout farm is crucial. You’ll need a spot that can accommodate a tank or pond, receives adequate shade, and is accessible for feeding and maintenance.
2.1 Consider the Climate
Trout prefer water temperatures between 50°F and 60°F (10°C to 15°C). If you live in a region with hot summers, you’ll need to find a way to keep the water cool, such as using a shaded area or investing in a water chiller. I’ve found that setting up my tank under a tree or in a shaded area of my yard helped maintain the right temperature range.
2.2 Check for Permits and Regulations
Before setting up your trout farm, check local regulations and obtain any necessary permits. Some areas have strict rules about raising fish at home, especially if you plan to sell or distribute them. It’s better to handle the legalities upfront rather than face fines or penalties later.
Step 3: Choose Your Trout Farming Setup
There are different ways to farm trout at home, each with its own pros and cons. Your choice will depend on your budget, space, and level of commitment.
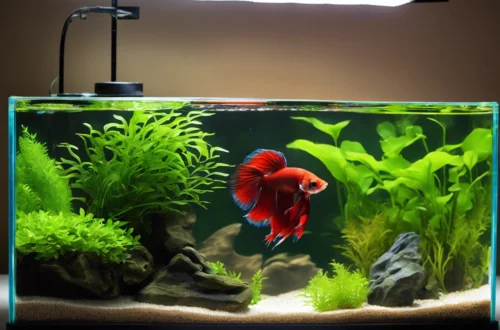
3.1 Tank Systems
Tanks are a popular choice for home trout farming because they are easy to manage and can be set up almost anywhere. You’ll need a sturdy tank made of food-safe materials, such as plastic or fiberglass, that can hold at least 200-500 gallons of water. I started with a 300-gallon tank, which was manageable for a beginner and provided enough space for a decent number of fish.
3.2 Pond Systems
If you have more space, a pond can be a great option. Ponds offer a more natural environment for the trout and can support a larger number of fish. However, ponds require more maintenance, such as managing algae and predators, and ensuring adequate oxygen levels. In my experience, ponds can be more aesthetically pleasing but require a bit more work to maintain.
3.3 Recirculating Aquaculture Systems (RAS)
For those who are serious about trout farming, Recirculating Aquaculture Systems (RAS) offer a high-tech solution. RAS use a series of filters to clean and recycle water, reducing the need for constant water changes. While the initial setup cost is higher, RAS can be very efficient and allow for higher stocking densities. If you’re tech-savvy and want to maximize production, RAS might be worth considering.
Step 4: Set Up Your System
Once you’ve chosen your setup, it’s time to get everything in place. Setting up your system properly is key to keeping your trout healthy and happy.
4.1 Install Filtration and Aeration
Trout require clean, oxygen-rich water, so a good filtration and aeration system is essential. For tanks, use a biofilter to break down waste and a mechanical filter to remove debris. Aerators or air pumps are needed to maintain high oxygen levels. In my tank, I use a combination of a sponge filter and an air stone to keep the water clean and oxygenated.
4.2 Test and Condition the Water
Before adding trout, test the water for pH, ammonia, nitrite, and nitrate levels. The pH should be between 6.5 and 8.0, and ammonia and nitrite levels should be close to zero. It’s also a good idea to cycle your tank, which involves growing beneficial bacteria that will help process waste. This can take a few weeks, but it’s a critical step to avoid deadly ammonia spikes once the fish are added.
4.3 Maintain Temperature Control
Trout need cool water, so if you’re using a tank, consider adding a water chiller or insulation if your area is prone to high temperatures. For ponds, you can add shade structures or plant trees around the pond to keep the water cool naturally. During the summer, I often add frozen water bottles to my tank to help keep the temperature down on particularly hot days.
Step 5: Stock Your Trout
Now that your setup is ready, it’s time to add the trout. Here’s how to do it safely and effectively.
5.1 Source Your Fingerlings
You can buy trout fingerlings (young fish) from hatcheries or fish suppliers. Make sure to choose a reputable source that offers healthy, disease-free stock. I usually go for fingerlings that are about 4-6 inches long, as they are easier to handle and more resilient than smaller fry.
5.2 Acclimate Your Trout
When you bring your fingerlings home, acclimate them to your setup just like you would when introducing new fish to an aquarium. Float the bag of fish in your tank or pond for 15-20 minutes to match the temperature, then gradually mix in your system’s water to adjust to the new water chemistry. This process reduces the stress on the fish and helps prevent shock.
5.3 Stocking Density
Be mindful of your stocking density. Overcrowding can lead to poor water quality and increased disease risk. A good rule of thumb is to stock 1-2 pounds of fish per 10 gallons of water for tanks, or 300-500 fish per acre for ponds, depending on your filtration system’s capacity. I’ve found that keeping a lower stocking density helps maintain better water quality and fish health.
Step 6: Feed Your Trout Properly
Feeding your trout correctly is crucial for their growth and health. Trout are carnivorous and need a high-protein diet.
6.1 Choose the Right Feed
Use a high-quality commercial trout feed that is formulated with the right balance of protein, fats, and vitamins. Pelleted feeds are common and come in various sizes depending on the age and size of your fish. I usually start with smaller pellets for young fingerlings and gradually move to larger sizes as they grow.
6.2 Feed Consistently and Avoid Overfeeding
Feed your trout 1-2 times a day, giving them only as much as they can consume in a few minutes. Overfeeding can pollute the water, leading to poor water quality and increased disease risk. I like to observe my trout during feeding to make sure they’re actively eating and to adjust the amount if needed.
6.3 Monitor Growth and Health
Regularly monitor your trout’s growth and health. Check for signs of disease, such as changes in color, unusual swimming behavior, or loss of appetite. Keep track of their growth rates, and adjust feeding amounts and schedules as necessary. I keep a simple logbook where I note down any observations, which helps me catch any issues early.
Step 7: Maintain Water Quality
Maintaining good water quality is one of the most important aspects of successful trout farming.
7.1 Regular Water Testing
Test your water regularly for ammonia, nitrite, nitrate, pH, and dissolved oxygen levels. Trout are sensitive to poor water quality, so staying on top of these parameters will help you catch problems before they become serious. I test my water weekly and anytime I notice changes in the fish’s behavior.
7.2 Perform Regular Water Changes
Even with good filtration, you’ll need to perform regular water changes to keep your system clean. In tanks, aim for a 10-20% water change every week. For ponds, partial water changes can be done using overflow or by adding fresh water periodically. In my setup, I do small water changes more frequently, which helps keep everything stable.
7.3 Manage Waste and Algae
Trout produce a lot of waste, so keeping your filtration system clean and functioning is essential. Clean filters regularly and remove any excess food or waste from the tank or pond. Algae can be a problem in ponds, so control sunlight exposure and consider adding plants or using an algaecide if needed.
Step 8: Protect Your Trout from Predators
Predators like birds, raccoons, and cats can pose a threat to your trout, especially in outdoor ponds.
8.1 Use Nets or Covers
For ponds, cover the surface with netting to keep out birds and other predators. Tanks can be covered with lids or mesh to prevent animals from accessing the water. I lost a few trout to herons before I invested in a sturdy net cover for my pond—lesson learned!
8.2 Add Hiding Places
Providing hiding spots for your trout can help them feel secure and reduce stress from predator presence
. In my pond, I use submerged logs and rocks to give the fish places to hide if they feel threatened.
Step 9: Harvesting Your Trout
When your trout have reached the desired size, it’s time to harvest them. The timing will depend on your goals—whether you’re raising trout for personal consumption, to sell, or simply to enjoy.
9.1 Decide When to Harvest
Trout typically reach harvest size (about 1-2 pounds) in 9-12 months, depending on water temperature and feeding practices. Keep an eye on their growth, and harvest when they reach your preferred size. I usually start harvesting when my trout are around a pound, as this size works best for my needs.
9.2 Harvesting Techniques
For smaller setups, you can use a net to catch the trout individually. For larger ponds, you may need a seine net or a specialized harvesting system. Handle the fish carefully to avoid stress or injury. I like to harvest in the early morning or late evening when the water is cooler, as this reduces stress on the fish.
9.3 Processing and Storing
After harvesting, process the fish quickly to ensure freshness. Clean and gut the trout, then store them on ice or freeze them immediately if you’re not cooking them right away. I usually prepare a few fresh and freeze the rest for later use.
Step 10: Keep Learning and Improving
Trout farming is a continuous learning experience. Each season brings new challenges and opportunities to refine your process.
10.1 Reflect on Your Experience
After each harvest, take time to reflect on what went well and what could be improved. Keep notes on your feeding practices, water quality management, and any issues that arose. This will help you make adjustments for the next batch.
10.2 Connect with Other Trout Farmers
Join online forums, local clubs, or social media groups to connect with other trout farmers. Sharing experiences and tips with others can be incredibly helpful, and you might even find new ideas to improve your setup. I’ve learned a lot from fellow hobbyists and farmers who have been generous with their knowledge.
Conclusion
Raising trout at home can be a rewarding and enjoyable way to produce your own fresh fish. With careful planning, the right setup, and a commitment to maintaining water quality, you can successfully raise healthy, delicious trout in your backyard. Whether you’re doing it for personal consumption, as a hobby, or even to start a small business, trout farming offers a great opportunity to learn about aquaculture and connect with nature. Happy farming!
FAQs
1. How much space do I need to start trout farming at home?
The amount of space you need depends on the type of setup you choose. Tank systems can fit in smaller spaces like a garage or backyard, while ponds require more room. A 300-gallon tank is a good starting point for beginners.
2. What should I feed my trout?
Trout need a high-protein diet, so a quality commercial trout feed is recommended. Pellets are commonly used and come in different sizes to suit various stages of growth.
3. How do I keep the water cool for my trout?
To keep water temperatures within the ideal range for trout, consider placing your setup in a shaded area, using a water chiller, or adding frozen water bottles during hot weather.
4. How long does it take for trout to reach harvest size?
Trout typically reach harvest size (about 1-2 pounds) in 9-12 months, depending on factors like water temperature and feeding practices.
5. Can I raise trout indoors?
Yes, trout can be raised indoors using tank systems or Recirculating Aquaculture Systems (RAS). Indoor setups allow for better temperature control but require adequate space and equipment for filtration and aeration.