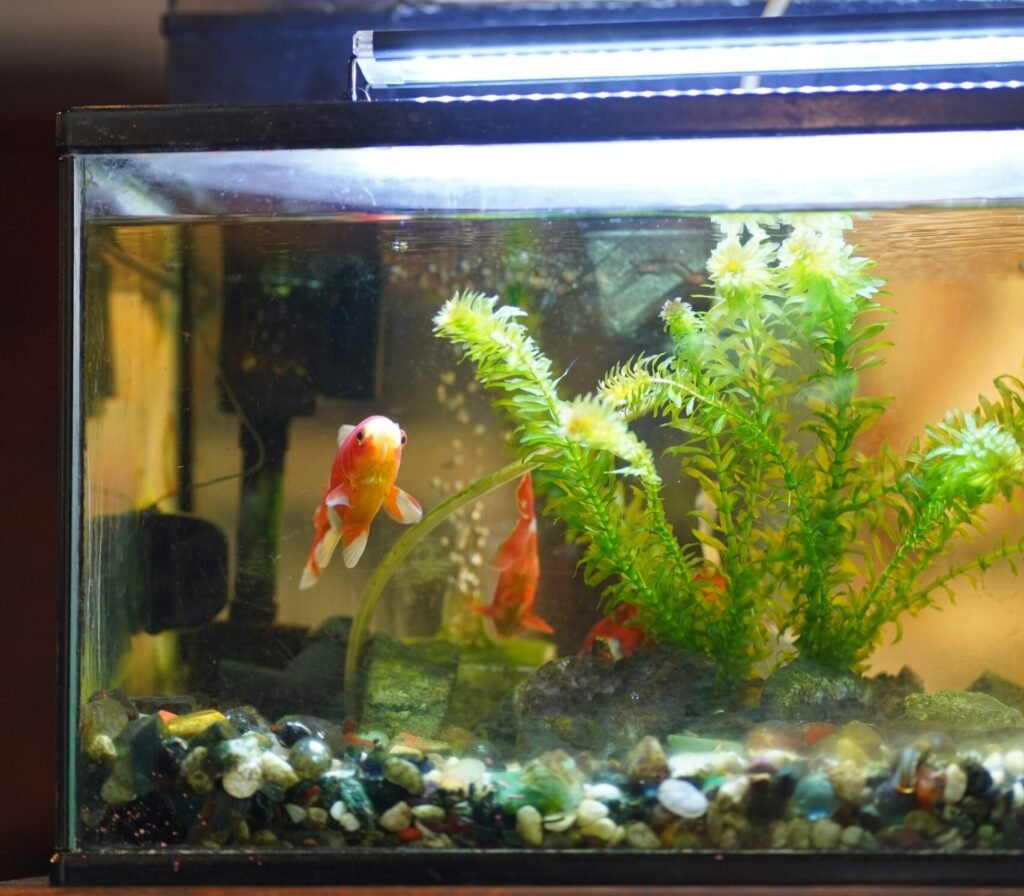
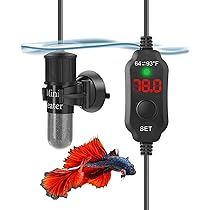
Aquarium Care

Best Way to Clean and Maintain Aquarium Heater

An aquarium heater is a crucial piece of equipment that helps maintain a stable temperature in your tank, ensuring your fish and other aquatic life stay healthy and comfortable. However, like all equipment, heaters require regular cleaning and maintenance to function effectively and safely. I’ve had my share of heater malfunctions over the years, and I’ve learned that keeping your heater clean and properly maintained can prevent a lot of issues down the road. In this guide, I’ll walk you through how to clean and maintain your aquarium heater so it can keep your tank at the perfect temperature.

Why Cleaning and Maintaining Your Heater Is Important

Aquarium heaters work continuously to regulate the water temperature in your tank. Over time, mineral deposits, algae, and biofilm can build up on the heater, reducing its efficiency and potentially causing it to overheat or fail. Regular cleaning and maintenance help ensure the heater’s longevity and accuracy, protecting your fish from temperature fluctuations that can cause stress and illness.

  • Prevents Malfunctions: Regular cleaning prevents buildup that can lead to inaccurate temperature readings or heater failure.
  • Ensures Efficiency: A clean heater maintains the set temperature more effectively, using less energy and reducing the risk of overheating.
  • Prolongs Heater Life: Proper maintenance extends the life of your heater, saving you money in the long run.

For more on choosing the right heater, check out How to Choose the Best Aquarium Heater.

Step 1: Unplug the Heater and Remove It from the Tank

Safety first! Always unplug your heater and let it cool down before removing it from the tank. Removing a hot heater can cause it to crack due to rapid temperature changes, and you don’t want to accidentally electrocute yourself.

1.1 Turn Off and Unplug

  • Turn off the heater’s power switch, if it has one, and unplug it from the outlet.
  • Wait for the heater to cool down, usually about 10-15 minutes, before handling it.

1.2 Remove the Heater from the Tank

Gently remove the heater from the water. If it’s attached with suction cups, carefully detach them from the glass to avoid breaking or damaging the heater. If your heater has an attached thermometer, make sure to handle it carefully to avoid damaging the probe.

For more on safely handling aquarium equipment, visit Safe Practices for Aquarium Maintenance.

Step 2: Inspect the Heater for Damage

Before you start cleaning, take a close look at the heater for any signs of damage, such as cracks, chips, or frayed cords. A damaged heater can be dangerous and should be replaced immediately.

2.1 Check for Physical Damage

  • Glass heaters: Look for cracks or chips in the glass. Even small cracks can lead to water seeping inside, causing the heater to fail or even short-circuit.
  • Plastic or titanium heaters: Check for any dents, discoloration, or signs of overheating on the surface.
  • Cords and plugs: Inspect the power cord and plug for any fraying or exposed wires. A damaged cord is a fire hazard and should not be used.

2.2 Test the Thermostat

If your heater has a built-in thermostat, check it by turning the heater dial to a lower or higher setting and listening for a click. If the thermostat isn’t clicking or you suspect it’s not working properly, it may be time for a replacement.

For more on troubleshooting heater issues, check out Common Aquarium Heater Problems and Solutions.

Step 3: Clean the Heater Exterior

Once you’ve inspected the heater, it’s time to clean it. Algae, calcium deposits, and other debris can accumulate on the heater, reducing its efficiency and causing it to overheat.

3.1 Use a Soft Cloth or Sponge

  • Use a soft cloth or sponge to gently wipe down the heater’s exterior. Avoid using abrasive pads or brushes, as these can scratch the heater, especially if it’s made of glass.
  • For tough spots, you can use a soft-bristled toothbrush to carefully scrub away any buildup.

3.2 Remove Mineral Deposits

Mineral deposits, often visible as white, chalky buildup, are common on heaters, especially in hard water conditions. To remove these deposits:

  1. Soak the heater in vinegar: Fill a small container with a 50/50 solution of vinegar and water. Submerge the heater (not the electrical parts) and let it soak for about 15-20 minutes.
  2. Gently scrub: After soaking, use a soft brush or sponge to gently scrub away the loosened deposits. Rinse the heater thoroughly with fresh water to remove any remaining vinegar.

Step 4: Clean the Heater Components (If Applicable)

If your heater has removable components, such as a protective guard or thermometer, it’s a good idea to clean these separately to ensure all parts are free from buildup and debris.

4.1 Remove and Clean the Guard

  • If your heater has a plastic guard, remove it and rinse it under warm water. Use a soft brush to remove any algae or debris stuck in the guard’s crevices.
  • For heavily soiled guards, soak them in a mild vinegar solution for a few minutes before scrubbing.

4.2 Clean the Thermometer or Probe

  • If your heater has an integrated thermometer or probe, wipe it gently with a soft cloth. Avoid using abrasive materials, as these can damage the sensor.

For more on maintaining equipment with multiple components, check out How to Clean and Maintain Aquarium Equipment.

Step 5: Rinse and Reassemble the Heater

After cleaning, it’s important to rinse the heater thoroughly to remove any cleaning solution or debris.

5.1 Rinse the Heater Thoroughly

  • Rinse the heater under fresh, dechlorinated water to remove any remaining vinegar or debris.
  • Make sure to rinse all components separately, including any guards or probes.

5.2 Reassemble the Heater

  • Once everything is rinsed and clean, reattach any removable parts, such as guards or thermometers.
  • Make sure everything is securely fastened and that there are no loose or missing parts before placing the heater back in the tank.

Step 6: Reinstall the Heater in the Tank

Now that your heater is clean and reassembled, it’s time to put it back in the tank. Proper placement and secure installation are crucial for the heater to function correctly and safely.

6.1 Proper Placement

  • Place the heater in an area with good water circulation, such as near a filter output, to ensure even heat distribution throughout the tank.
  • Make sure the heater is fully submerged, especially if it’s a submersible model. Most heaters have a minimum water line marked on them—ensure the water level is above this line.

6.2 Secure the Heater

  • Attach the heater securely to the tank wall using suction cups or mounting brackets. Make sure it’s positioned away from decorations, rocks, or anything else that could block water flow around the heater.
  • Double-check that the heater is secure and not in a position where it can fall or be dislodged by fish.

For more on proper heater placement, check out How to Position Your Aquarium Heater for Optimal Performance.

Step 7: Allow the Heater to Acclimate and Test

Before plugging the heater back in, give it some time to acclimate to the water temperature. This step is important to avoid shocking the heater’s internal components with sudden temperature changes.

7.1 Allow Acclimation

  • Leave the heater in the tank for about 15-20 minutes without plugging it in. This allows the heater to adjust to the tank’s water temperature gradually.

7.2 Plug in and Test

  • Plug the heater back into the outlet and turn it on. Set the thermostat to the desired temperature and monitor the heater over the next few hours to ensure it’s functioning correctly.
  • Use a separate, reliable aquarium thermometer to verify that the heater is maintaining the correct temperature. If you notice any fluctuations or the heater isn’t heating properly, you may need to replace it.

Step 8: Regular Heater Maintenance Tips

To keep your heater functioning efficiently and safely, it’s essential to perform regular maintenance and checks.

8.1 Monthly Inspection

  • Inspect the heater monthly for signs of wear or damage. Check the glass for cracks and the cord for any signs of fraying.
  • Test the thermostat to ensure it’s maintaining the correct temperature.

8.2 Regular Cleaning

  • Clean the heater every 1-2 months or whenever you notice algae or mineral buildup. Regular cleaning prevents the buildup of debris that can reduce the heater’s efficiency.

8.3 Monitor Water Quality

  • Keep an eye on your tank’s water quality, as poor conditions can lead to faster buildup on the heater and other equipment. Regular water changes and proper filtration will help keep the heater clean and functioning properly.

For more tips on maintaining your aquarium equipment, visit Comprehensive Guide to Aquarium Equipment Maintenance.

Proper cleaning and maintenance of your aquarium heater are crucial for ensuring the safety and health of your fish and other tank inhabitants. By regularly inspecting and cleaning your heater, you can prevent malfunctions, maintain a stable temperature, and extend the life of your equipment. Following these best practices will help keep your aquarium environment stable and comfortable for all its residents.

If you need more detailed information on heater types and maintenance, check out Complete Aquarium Heater Maintenance Guide.

FAQs

1. How often should I clean my aquarium heater?
It’s recommended to

clean your aquarium heater every 1-2 months, depending on the amount of buildup. If you notice algae or mineral deposits, it’s time to clean it.

2. Can I use tap water to rinse my aquarium heater?
Yes, you can use tap water for rinsing, but be sure to thoroughly rinse off any vinegar or cleaning solution. Allow the heater to dry completely before putting it back into the tank.

3. What should I do if my heater has a crack?
If your heater has a crack, it’s best to replace it immediately. A cracked heater can fail or even cause electrical hazards.

4. How can I tell if my heater is malfunctioning?
Signs of a malfunctioning heater include fluctuating water temperatures, the heater staying on constantly, or the heater not turning on at all. Use a reliable thermometer to monitor water temperature regularly.

5. Can I clean my heater while it’s still in the tank?
It’s not recommended to clean your heater while it’s still in the tank. Always unplug and remove the heater before cleaning to avoid electrical hazards and damage to the heater.

Leave a Reply

Your email address will not be published. Required fields are marked *